If you’re using a computer for families and/or staff to check in you’ll need to set these options to control how the check-in process works, what information people may view and how check-in times are rounded. There are also special settings for hardware devices like fingerprint readers, door control devices and receipt printers.
Getting There
- Use the Procare Check In shortcut to open the check-in screen.

- Dbl-click (or dbl-tap) anywhere in the gray border area around the logo (or press Esc on your keyboard) and then select Options.

- The Options screen:

- Jump to the following Options categories below:
- Main Screen
- Family Data
- Employee Data
- Hardware
Main Screen Options
- Important! Under School Info select the location for which to check people in.

- Optional: For School Picture select an image you’d like to have displayed at the main check-in screen (use Preview to see it) or click Add and browse to your own image, like a logo for your school.

Hint: Although any size image will work for best results the image should be 554 pixels wide by 327 pixels high or a similar proportion. Supported file types are .bmp, .jpg, .jpeg, gif and .png.
- Recommended: Choose which Language(s) you want to have available for check in. If you select more than one a button will appear at the main check-in screen so people will have a choice.

- Optional: You may change the appearance of the check-In screen by selecting a Skin (color scheme). We recommend the one named “Procare”.

- Important: Select a Screen Time-Out. If a person walks away from the screen without completing the check-in process it will return to the opening screen after the specified time. A best practice is to select a short time out.

- Important: Select the Check-In Type you’ll use. This determines the type of identification needed to check in.
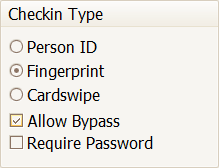
-
Person ID – People will choose a Person ID Number and a separate numeric password. They would use both their PIN and password each time they check in.
2. Fingerprint – People will use their fingerprint (requires a biometric ID pad).
3. Cardswipe – People will swipe their card (requires a card reader) and a numeric password (optional). Any magnetic stripe card may be used such as a credit card, grocery club card, etc.
4. Allow Bypass – If Fingerprint or Cardswipe are selected, the bypass option lets people choose not to use those methods of identification and instead select a Personal ID Number with a separate numeric password. They would use both their PIN and password each time they check in.
5. Require Password – If Fingerprint or Cardswipe are selected you may require people to use a password in addition to the fingerprint or magnetic card by checking this box. -
Important: Hide Mouse Pointer – If you’re using a touch screen monitor, check the option to Hide Mouse Pointer.
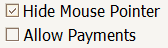
- Optional: Allow Payments – If you accept credit cards through Tuition Express and want families to be able to swipe their card to pay at check in (or make this a payment kiosk), be sure to check the Allow Payments box.

See also:
Family Data Options
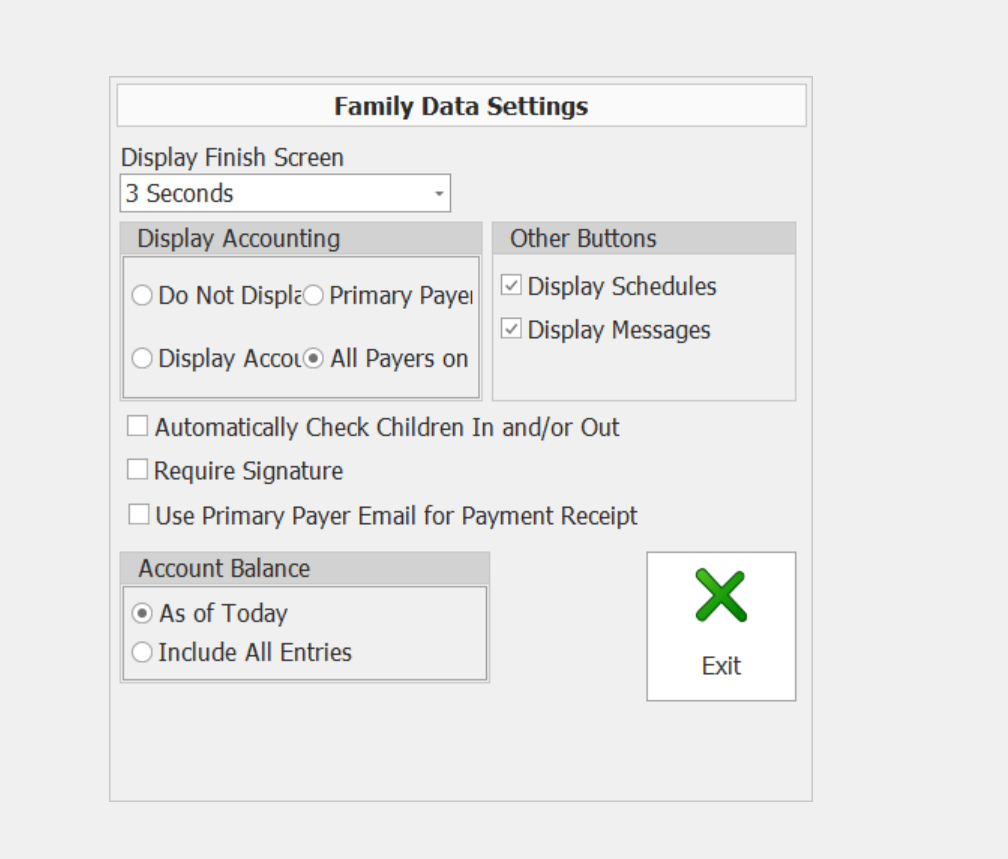
Select the Family Data button for settings related to family check in.

-
Important: Display Finish Screen – Choose how long to display the final screen that lets people know they completed the check-in procedure successfully.

-
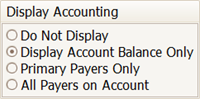
Recommended: Display Accounting – Choose whether to display the Account Balance Only or the history of recent charges, payments and credits to Primary Payers Only, All Payers, or not to display any balance or accounting.
-
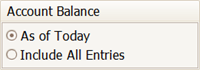
Recommended: If you choose to display the balance or accounting, you’ll also want to decide wheter to display the Account Balance (and/or accounting history) as of “Today” or to “Include All Entries” (items posted for future weeks/months would also be included).
-
Recommended: Other Buttons – Choose to display child Schedules, and/or Messages.
-
Optional: Automatically Check Children In/Out – This feature assumes all children in the family are to be checked in or out at once. Since siblings may attend at different times, or on different days, it’s generally best to leave this unchecked.

-
Optional: Check Require Signature if you are using a signature capture device. At the end of the check-in process the person will be required to sign their name. Please note that although the signature is recorded, it is not used for identification purposes.

-
Optional: Tuition Express centers that allow payers to pay at check-in, may check Use Primary Payer Email if needed. This is useful when you want all receipts emailed to the primary person on the account, regardless of who is making the payment—for example if mom is the primary payer, and dad checks the child in and makes a payment, the receipt would be emailed to mom. If parents have their own separate accounts (such as with divorced parents), they will always get separate receipts regardless of whether this box is checked or not.

Employee Data Options
Select the Employee Data button for settings related to staff check in.
- Recommended: Choose to display the employee Time Card, Schedule, Immunizations due and Messages.

Hardware Options
- Important: Fingerprint Reader: If a fingerprint reader is found its serial number will be displayed. If more than one fingerprint device is found, select the one you wish to use from the drop down list then click the Test button to confirm it is working properly.

-
Important: Door Controller: The optional Door Controller may be connected to an electrically operated interior door for security purposes. Use the set up appropriate for your door controller. If you use the serial type Door Controller, see: Serial Door Controller Set Up . If it is not serial, it must be a Network-Door-Controller.

-
Optional: Receipt Printer: If you are using a Zebra brand ticket printer follow the steps below. See also: Zebra Printer Setup
- Check the Enable Printing box.
- Click the Select button and choose the Printer.
- Choose any other printer settings as needed.
a. Enter the Paper Width so the printed text will fit correctly on the receipt.
b. Check Printer Has a Cutter only if your Zebra printer automatically cuts the paper after printing each receipt. This is not common because most printers require the person to tear the receipt off themselves.
c. Check Print Messages if you wish to have check-in messages included on the receipt.
d. Check Separate Ticket Per Child if you wish to print individual receipts when a person checks in more than one child. If left unchecked a single receipt listing all children will be printed.
e. Check Duplicate Tickets if you want two copies of each ticket printed, one for the pick up person to keep and another for them to give to the teacher. When used with the Separate Ticket Per Child setting two tickets will be printed for each child checked in or out.
-
Optional: Signature Capture: If you are using a signature capture device there may be rare cases when it is necessary to repair the .INI file associated with the signature pad. Use the Repair Sig Pad INI File button only when directed to do so by Procare Technical Support.
-
Optional: You may select the Password button and enter a password. Anyone who needs access to this Options screen or to Exit out of the Check-In program will need to know it.

-
Recommended: Select the Description button and give this computer a name, like “Front Door”, “Side Entry”, etc.
-
Optional: Choose the Sound button and select a sound file (.wav) to play when a person checks in/out. A sound button with a red slash indicates no sound has been selected.
Sound selected = NO Sound Selected = YES