The Billing Box is where recurring charges are set up for each child. Learn how Contract Cycles, Billing Formulas and Child Schedules can work together in the Billing Box.
Getting There
Look up a Family and click once on the name of the child to select them.
With the child’s name selected click the Billing Box icon (money bag) on the child toolbar.

If you have the Attendance Tracker module there will be two tabs, one for Contract billing and another for Billing Formulas. Otherwise Contract billing will be the only choice.
Divorced Parents: How to handle Billing for Divorced Parents or multiple payers.
Difference between Contract & Formula Billing.Difference between Contract & Formula Billing.
Billing Box Audit
The Billing Box Audit History feature allows you to track and review all changes made to a child's billing box.
Accessing the Billing Box Audit History
Navigate to the child's billing box.
Under the child billing box, select the Audit icon.
The Billing Box Audit History panel will open, displaying a log of all changes.
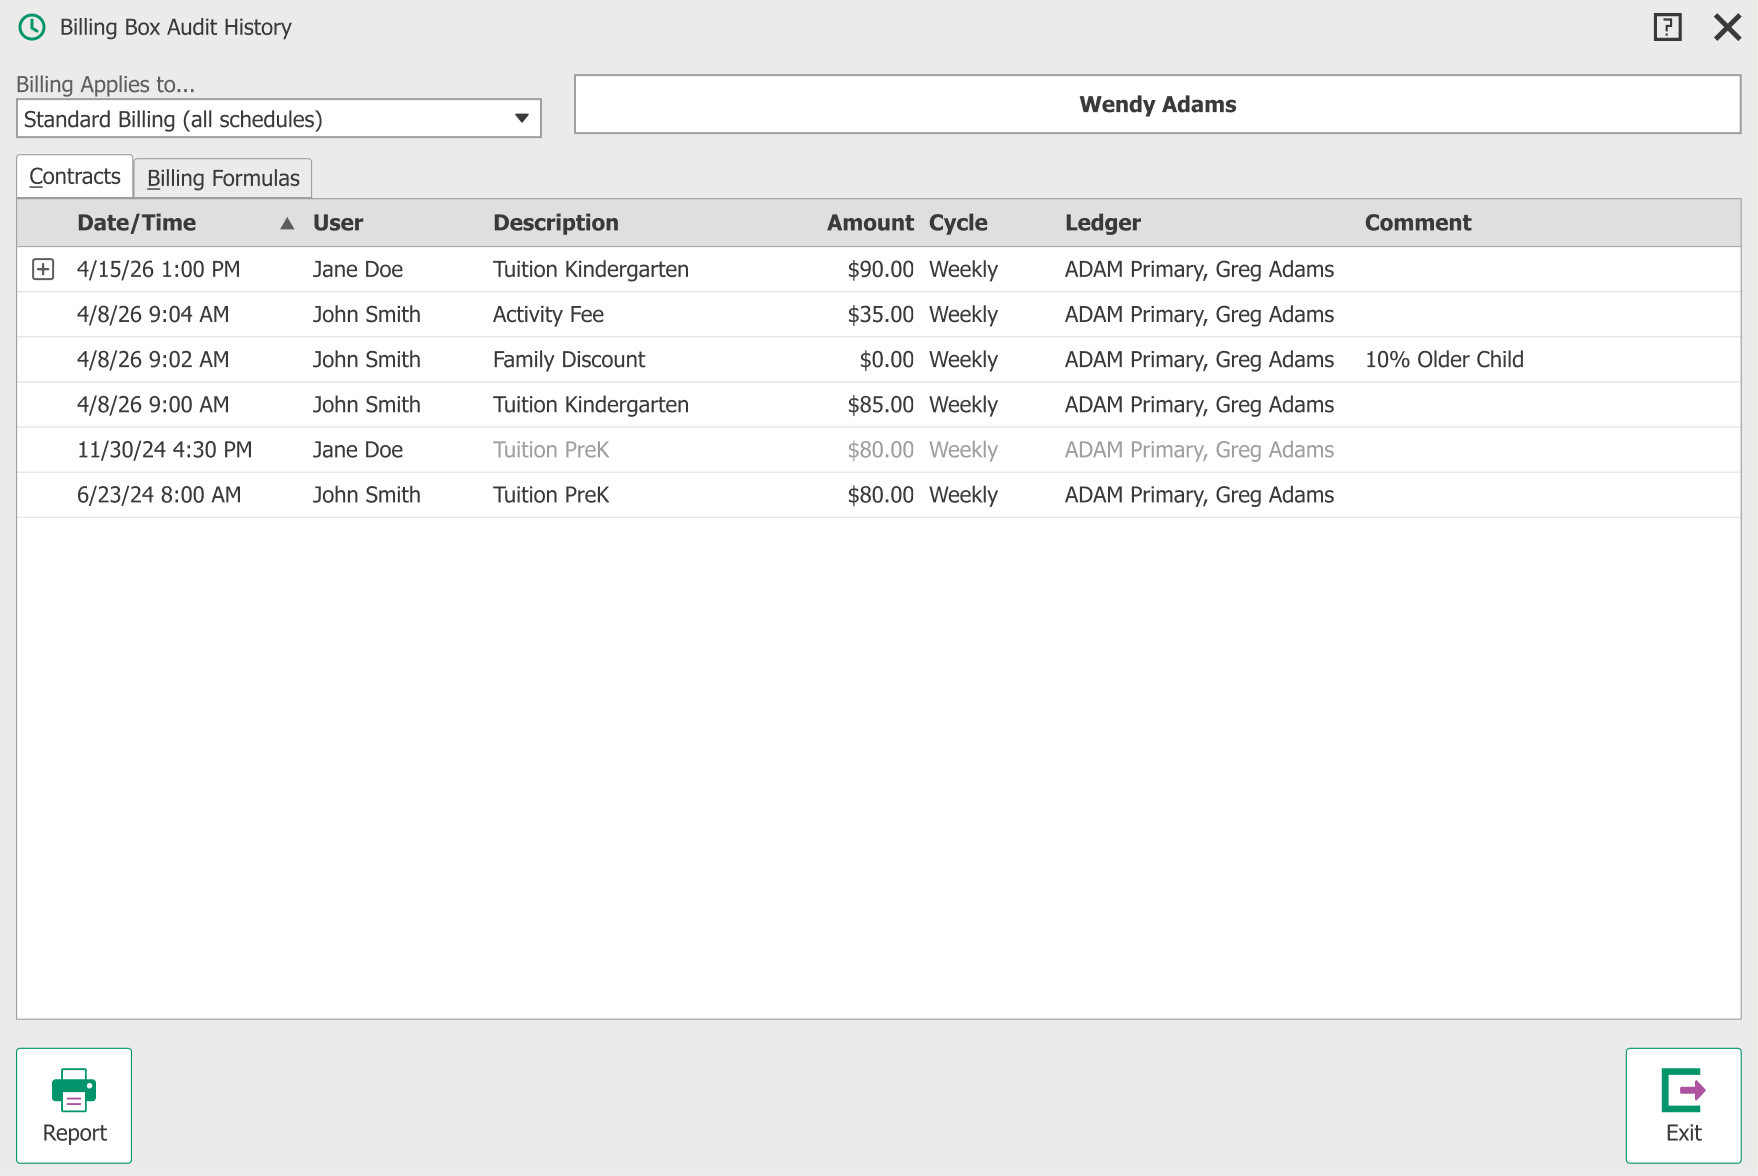
Changes made prior to 5/27/26 will display System Administrator as the user who made the changes.
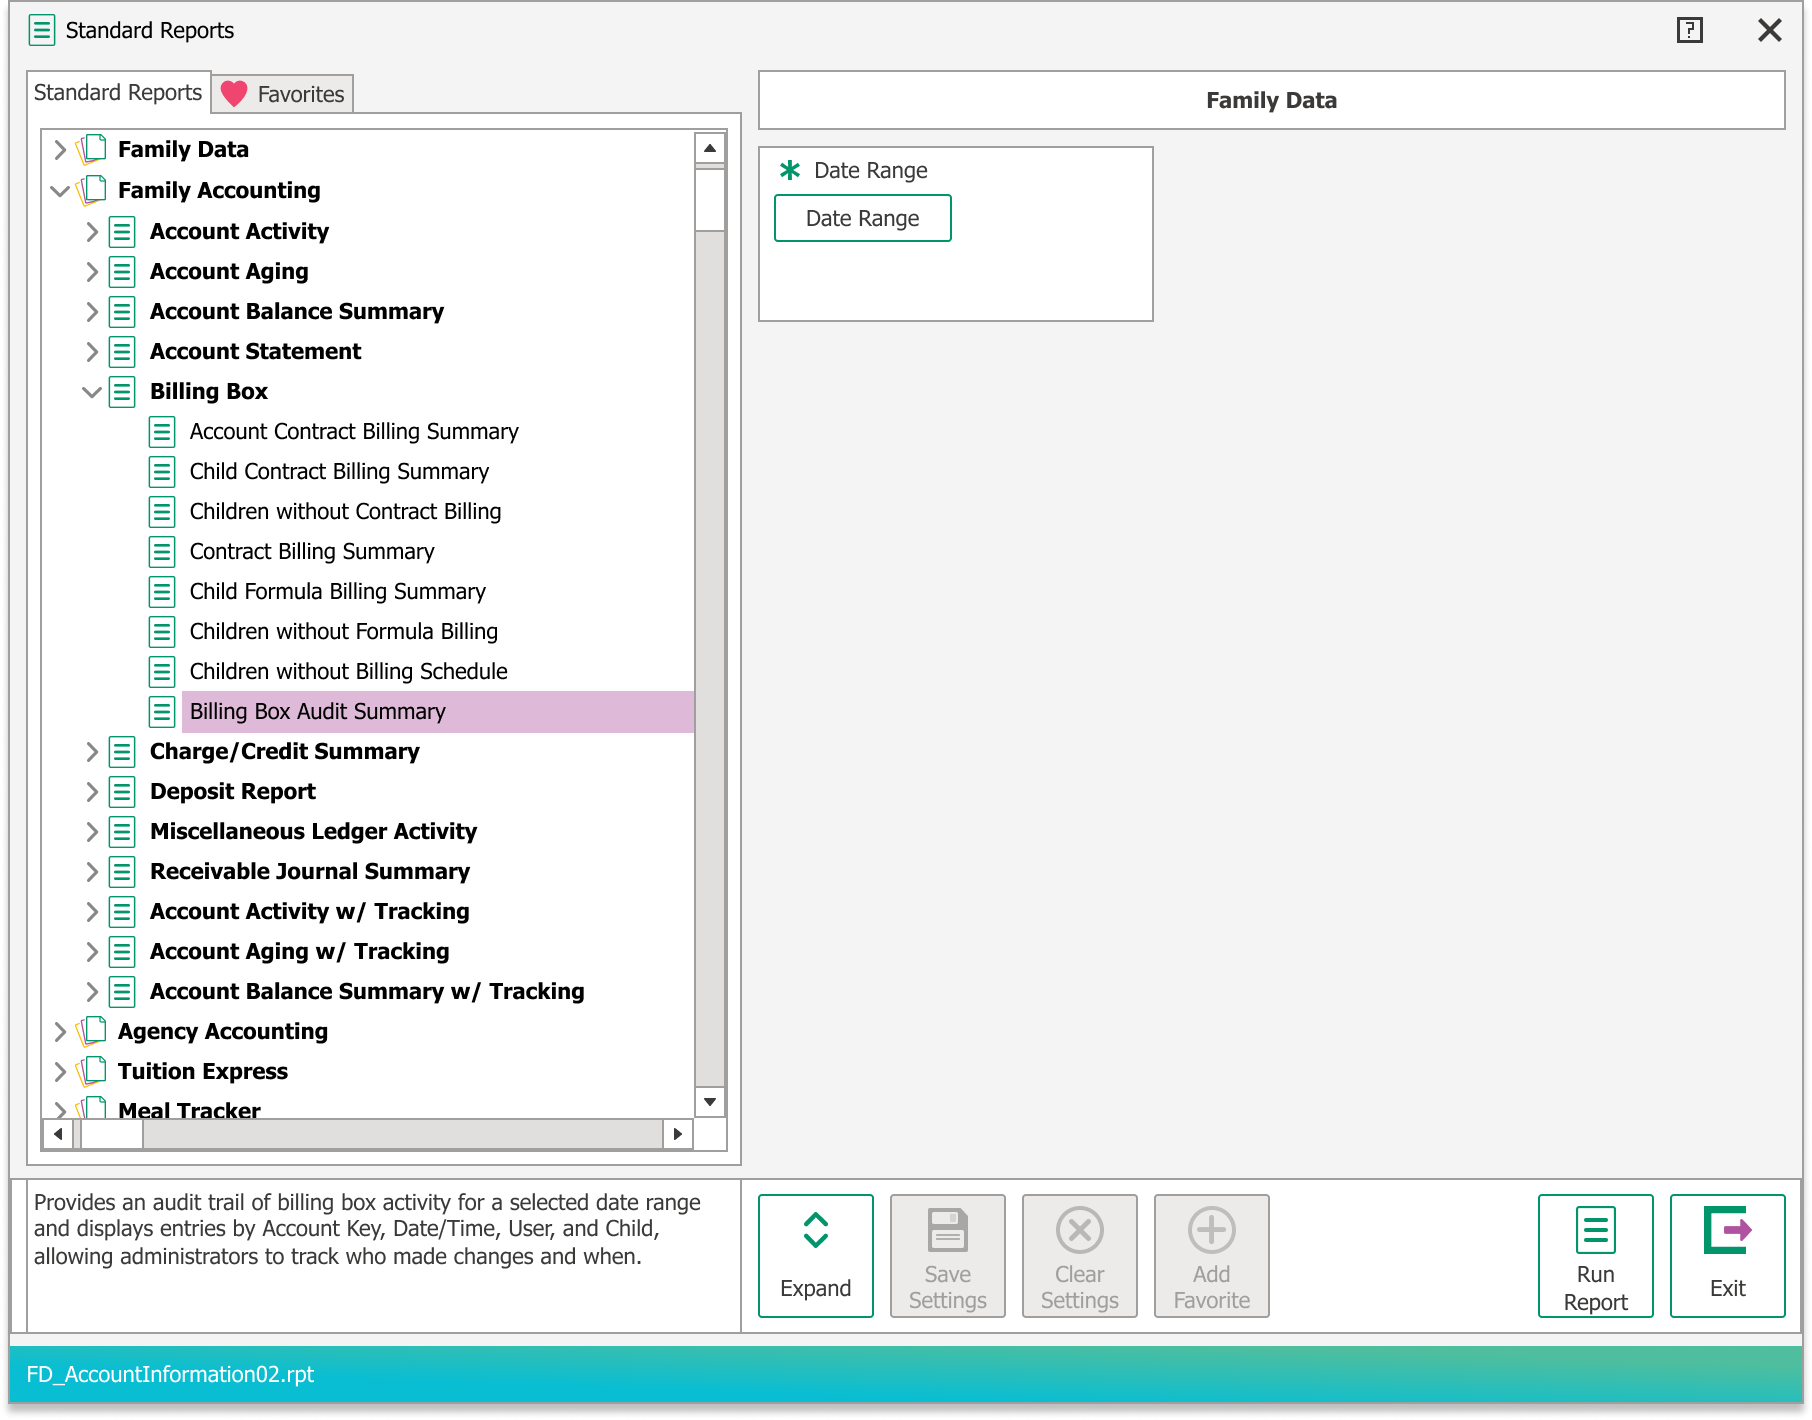
Billing Box Audit Summary Report
A Billing Box Audit Summary Report is available for a broader view of audit activity across billing boxes.
To access the report, navigate to: Family Accounting>Billing Box>Billing Box Audit Summary.
Using Contract Billing
a. Select the scheduled time frame during which this item will apply (top left). Choose Standard Billing (all Schedules) or pick a particular schedule from the list. If you are not using Child Schedules, then select “Standard Billing (all Schedules)”.
Example: For a Monthly Supply Fee that applies all the time, regardless of schedule, choose “Standard Billing (all Schedules)”. For a Tuition Fee that varies, based on the time frame of the schedule to which the child is assigned, choose a “Current” or “Future” schedule.
b. Click the top (blank) line to add a new item.
c. Select the Ledger Card of the person responsible for payment of this item. Typically either the Primary Payer (parent) or a subsidizing agency (see Agency Accounting Overview).
d. Choose the Cycle for when this item is charged (weekly, monthly, etc.).
e. Choose a Description like “Tuition Toddlers”, “Family Discount”, “Copayment Fee”, etc.
f. Enter a Comment if needed to describe this item. It’s not necessary to put the child’s name in the comment box. You’ll have the option to automatically include their name when you run Automated Contract Billing.
Note: For Family Discounts use a percentage as the Comment (like 10% older child) to automatically calculate the discount. Learn more about Family Discounts.
g. Enter or confirm the Amount. If this item has been set up for a Standard Amount the amount will automatically be entered, although you may type over it as needed.
h. Click Save. A new blank line appears. Continue adding items as needed then click Save > Exit.
Hint: Use Copy & Paste to copy lines in the Billing Box from one schedule to another (like from a “Current” to “Future” schedule). This will save time if, for example, everything is the same except the rate. Use the drop down arrow to copy the one selected line or all lines.

Using Formula Billing
Use of formulas requires the Attendance Tracker module. Billing Formulas must be set up first in the System Configuration.
a. In the child’s Billing Box click the Billing Formulas tab.
b. Select the scheduled time frame during which this item will apply (top left). Choose Standard Billing (all Schedules) or pick a particular schedule from the list. If you are not using Child Schedules, then select “Standard Billing (all Schedules)”.
Example: For an hourly or daily rate that applies all the time, regardless of the time frame, choose “Standard Billing (all Schedules)”. For a rate that varies, based on the time frame of the schedule to which the child is assigned, choose a “Current” or “Future” schedule. For example, your Summer and School Year rates may be different.
c. Click the New Formula button.
d. Select the Ledger Card of the person responsible for payment of this item. Typically either the Primary Payer (parent) or a subsidizing agency (see page 72 for agency set up).
e. Choose a Description like “Tuition Toddlers”, “Family Discount”, “Copayment Fee”, etc.
f. Choose the Formula Name used to determine the amount this item (hourly rate, late pick up, etc).
g. If the formula has Variables such as the rate, etc. enter the appropriate number(s) in the Value column.
h. Enter a Comment if needed to describe this item. It’s not necessary to put the child’s name in the comment box. You’ll have the option to automatically include their name when you run Automated Formula Billing.
i. Click Save > Exit to return to the child’s Billing Box. Continue adding items as needed then click Exit.