Child Time Card
- 07 Feb 2024
- 1 Minute to read
- Print
Child Time Card
- Updated on 07 Feb 2024
- 1 Minute to read
- Print
Article Summary
Share feedback
Thanks for sharing your feedback!
Use the Time Card to view a child’s clock in times or make manual entries and corrections.
Getting There
- Look Up the family and click once on the name of the child to select them.
- Click the Time Card icon (clock) on the child’s toolbar.

Child Time Cards – Add / Change a Entry
To enter a new line, the previous line must have both a Time In and Out.
- Click the bottom (blank) line and select a Classroom.
- Confirm the Date In and Time In which default to the current date and time. Make changes as needed.
- Optional: If you’re ready to add check “out” information select a Date Out then confirm the Time Out which defaults to the current time. Make changes as needed.
- Click Save.

If the line just entered has both a Time In and Out you may continue adding additional lines clicking Save after each one.
Hints:- Hold your mouse (hover) over the far left side of the line to see the total hours for that line.
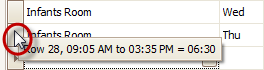
- Hold your mouse (hover) over the far left side of the line to see the total hours for that line.


a. Click Show Rounding to see in / out times rounded then click Show Actual to toggle back to the exact time. Rounding may be set by a System Supervisor at the Regions & Schools Options screen.

a. Use the Audit button to view a history of all changes on the Time Card.

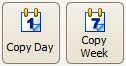
a. Use Copy Day or Copy Week to quickly repeat information. Click on a new blank line then click Copy Day or Copy Week.
- When finished, click Exit.
Enter Time for a Prior Day
If the child is currently checked in and you need to enter time from a previous day, use the Batch Post Child Time Card function. You cannot manually enter a new line on the Time Card while a person is currently checked in.
Was this article helpful?