The Person Information screen is the place to record and maintain basic information about people in your database like their name, address, phone number, date of birth, gender, identification number, email address, photograph and so on. A person can be anyone including children, parents, authorized pick ups, emergency contacts, volunteers, employees, vendors, etc.
Note: Once a person has been entered the first time, you’ll re-use them as an “existing person” in other places in Procare. For example, a person may be a Payer on the account, as well as an authorized Pickup for children in their own family and a neighbor’s family. Or, an employee may also be a *Procare User *and perhaps a parent as well.
When used with the Attendance Tracker module, the Person Information screen is also the place to send Check-In Messages to specific people and to generate a temporary Registration Number for authorized pickup people.
Getting There
You may access the Person Information from a number places depending on whether the person is a child, parent, emergency contact, pick up person, Procare user, employee or vendor. The most common ways to get there are to Add a New Family or Look Up an existing family.
Change Information for a Person:
To edit the information for an Existing person dbl-click directly on their name anywhere you see it in Procare.

Add a New or Existing Person:
When adding a person click the small down arrow on the Add button. In most cases it will look similar to the images below. You can choose add a New Person or Existing Person.
| Adding a Payer (Parent) | Adding a Child |
|---|---|
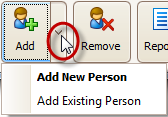 |
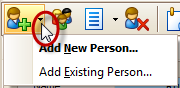 |
Person Information & Person Reconcile Screens
Enter or change data on the Person Information screen.
-
Enter the name, DOB, gender, email, etc., as desired. The only required fields are first & last name.
Email: Each person may have just one email address on record. If they have more than one, choose a single address to which email messages will be sent. -
Note: The Identification Number is optional. It may be used for an account number you assign to the person, a DHS case number, or a photo ID (like a driver’s license number), etc.
-
Under Address Information click New and enter their physical and/or mailing address, etc. then click Update. You may enter more than one – just click Update after each one. Then click Exit to return to the Person Information screen.
Hint 1: To change an existing address or phone number dbl-click anywhere in the address or phone box.
Hint 2: Learn how to Copy an Address / Phone from one person to another.
Hint 3: Click the Map It button (lower left – image above) to see that address on a map. -
Under Phone Information click New, choose a Telephone Type (like work, home, or cell), then enter the Area Code and Telephone Number and a Comment (optional) then click Update. You may enter more than one phone number – just click Update after each one. Then click Exit to return to the Person Information screen.
-
Learn how to Add a Photo, or, if the photo already exists, click Export Photo to save the image in .jpg, .png or .bmp format.
-
If you are editing an existing person just click Save > Exit and you’re done.
-
If you are adding a new person click Continue (lower right). If people with similar names, addresses, phone numbers or dates of birth are found, you’ll have a chance to:
a. Select a suggested person as a match and reconcile the information of the two people. Click the name of a suggested person (top half of screen) then click Select (upper right). There may be information to reconcile. If so, check the address(es), phone number(s) and email you wish to keep, then click Continue. You’ll return to the Person Information screen where you may make any necessary changes then click Save > Exit.
Hint: The color coding indicates the likelihood of a match. Green is the most likely, yellow means somewhat likely, and gray means less likely.
b. Continue with the person you have just entered to save them as a brand new person. Click once on their name under the New Person section (bottom half of screen) then click Save (lower right).
c. If no match is found you’ll automatically return to the appropriate screen with the person’s name displayed.
Note: If you’re adding a family (an Account) you may continue adding additional payers as needed for this family. Use the Up & Down arrows to change their order. The first person on the list is considered the Primary Payer (the person responsible for making sure the bill is paid).


