Check In Station
- 17 Oct 2024
- 9 Minutes to read
- Print
Check In Station
- Updated on 17 Oct 2024
- 9 Minutes to read
- Print
Article summary
Did you find this summary helpful?
Thank you for your feedback!
How to Check In
This article describes how to check children or employees in using a check-in computer (or touch monitor).
Before you check in a child
In order to check a CHILD in:
The child care provider will:
- Issue a Temporary Registration Number to each pickup person (on the Information & Relationships screen).
- Confirm the child is Enrolled (as of today) and has a Primary Classroom (on the Information & Relationships screen).
The PICKUP PERSON must Register to Check In.
How to check in a child (Authorized Pickup)
Before an employee checks in
In order to check an EMPLOYEE in:
The employer will:
- Issue a Temporary Registration Number to each staff person.
- Confirm the staff person is employed as of today (see Employment Status) and has a Primary Work Area and School location (on the Information & Relationships screen).
- Assign a Schedule if using the Option to “Restrict Check In / Out to Schedule”.
The STAFF PERSON must Register to Check In.
How an employee checks in
How an employee checks both their child and themselves in
At the check-in screen select Start

Enter the identification requested. Depending on which Option your provider (or employer) has selected, one of the following must be used.
The Personal ID Number (PIN) and password you chose when you first registered.
The Fingerprint used to register (and the password you used, if required).

The Magnetic Swipe Card used to register (and the password you used, if required).
If you are eligible to check-in BOTH children you are authorized to and yourself as an employee, select the desired option from this screen (when you have completed the first option chosen, you will return to this screen to perform the other option, if desired):


Select the children (or Employee) to check in / out so the button says they “will be checked in” (or out). View any items that may be available like Accounting, Schedules, or Balances.

Notes:
a. Employees will also confirm/select the Work Area and Pay Code to use for check in.
b. Messages are displayed before the check-in process can be finished. Learn how to Send Messages.
c. If you’re using the option to “Automatically check children in” then you would select any children you did not want to check in or out.Choose Submit (image above – bottom right). A confirmation screen will be displayed and the check in / out time will now appear on the Child’s Time Card or Employee Time Card.
When done checking yourself and the children in, click cancel (image above – top right) to save the times and exit the screen.


What is required for a child to be checked in?
In order for a child to be checked in or out they must:.
- Have an Enrollment Status of “Enrolled” as of the current date.
- Be assigned to a Primary Classroom on their Information & Relationships screen.
- Have at least one pickup person assigned to them (also on the Information & Relationships screen).
- And that person must have Registered at the Check in Computer.
Can a person check in using only an ID code without a password?
No. If a pickup person is using an ID code (rather than their fingerprint) to check children in, they must use a password to go with it. This is required to make it a secure system, just like having a username and password to log into a computer or website.
Can a staff person with children check both a child and themselves in?
Yes. If a person has been added as an employee and is listed as a pick up person for at least one child on their Information & Relationships screen they can check the child in, or themselves. They only need to Register for Check In once.
- The staff person begins the check in process using their fingerprint, swipe card, or personal ID plus password.
- A check in screen will appear with the option to check a child in as an Authorized Pickup or themselves as an Employee.

- After making that choice they complete the normal Check In Process for either the child or themselves.
- They automatically return to the screen to choose Authorized Pick Up or Employee again. So if they began by checking in a child, they may now check themselves in.
Can the Check-In Computer play a sound when a person checks in/out?
Yes. Go to the Check-In Options screen, then click the Sound button (bottom center) and select a sound file (.wav) to play when a person checks in/out. A sound button with a red slash indicates no sound has been selected.
| Sound selected = NO | Sound selected = YES |
|---|---|
 |  |
How do people buzz the door open without checking in?
If your check-in station is connected to an electrically operated door, using the Procare Door Controller, you may allow employees or pick up people to buzz the door open without checking in or out.
Turn this feature on/off:
- Go to the Check-In Options screen and choose Hardware.
- At the Hardware screen, uncheck one or both boxes to allow entry without checking in; check the boxes to force people to check in before the door will open.
a. Authorized Pickup: Require Check In/Out to Open Door
b. Employee: Require Check In/Out to Open Door

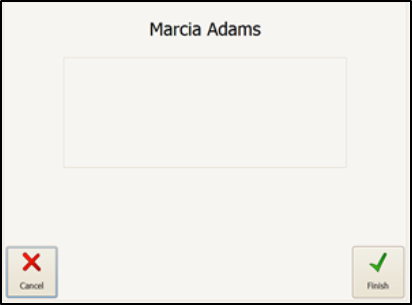
If you allow employees or pick up people to buzz the door open without checking in, how to do so depends on whether they are an employee, pickup person, or both. Employee or a Pickup Person (but not both):
Act like you are going to check someone in, but instead of selecting a person choose Finish and say OK. The door will open after selecting OK.
 then
then 
Person is both an Employee and Pickup Person:
The door will open when you choose Cancel (or Exit) at the opening screen where you decide whether you’re acting as a pickup person or employee. The Exit button will only be shown if you have already gone to the authorized pickup or employee screen.

Dbl-click (or dbl-tap) anywhere in the gray border area around the logo (or press Esc on your keyboard) and then select Options.

Under School Picture, select the picture you’d like to have displayed. You may select Preview for a quick view of it.
 {height="" width=""}


 {height="" width=""}
Optional: You can click Add and browse to your own image, like a logo for your school.
Hint: Although any size image will work, for best results the image should be 554 pixels wide by 327 pixels high or a similar proportion. Supported file types are .bmp, .jpg, .jpeg, gif and .png.
What does ''Please see the Director'' mean?
There are two different (but similar) messages depending on when the message appears:
If the message only says “Please see the Director” and appears at the start of the check-in process (image 1), just after the person has identified themselves, it indicates the child does not have a Primary Classroom assigned on their Information & Relationships screen.
Image1

If the message says “Procedure did not complete successfully. Please see the director” and happens at the end of the check-in process (image 2), when the person presses Finish, it means there is a conflict on the time card, for example they were not checked out the previous day.
Image2


What does ''You are not eligible for any transactions'' mean?
When trying to check in a person might get the message: “Your information was found, but you are not eligible for any transactions at this school.”

For a pickup person this may be caused by:
- The child for whom they are authorized pickup does not have their Enrollment Status set to “Enrolled”.
- You have more than one location and the family is not set up for the selected location; for example, the Smith family is entered in location 1, but the check-in screen is set for location 2.
- The adult is not marked as a Pickup person for any child on the Information & Relationships screen. This may happen if the adult is entered in Procare more than one time; for example, Mary Smith 1 is assigned as a pickup, but Mary Smith 2 is trying to check in and she is not a pickup. See: Remove Duplicate People
- The parent was accidentally registered under the child’s name instead of under their own name. To check for this possibility, go to Reports> Standard Reports> Attendance Tracker> Registration> Registered. Check to see if the parent’s name is there. Since the child is not usually marked as a Pickup person for themselves, the “not eligible” message appears. To resolve this, Clear the Registration for the child and re-register the parent under their own name.
- For versions below 10.2.4891, it could mean the child does not have a Primary Classroom assigned on their Information & Relationships screen.
For an employee this may be caused by:
- The employee does not have their Employment Status set to “Currently Employed”.
- You have more than one location and the employee is not set up for the selected location; for example, Mary Smith works at location 1, but the check-in screen is set for location 2.
Why don’t all the children I check in show up on final screen?
The “Procedure Completed Successfully” screen (sometimes called the “Thank You” screen), has limited space and can only show a maximum of 3 children. If you checked more than 3 children in or out, their check in times were still recorded even though their names did not appear on the screen.

Why is the check in screen blank with no children showing?
When trying to check in a person might see a blank screen with their own name, but no children.
This may be caused by:
- The child does not have a Primary Classroom assigned on their Information & Relationships screen.
- The adult is not a pickup person. They may be a Payer on the account, but the Pay at Check In feature is not enabled.
Was this article helpful?