Reconcile Account Ledger - Digital Payments
- 21 Jan 2025
- 1 Minute to read
- Print
Reconcile Account Ledger - Digital Payments
- Updated on 21 Jan 2025
- 1 Minute to read
- Print
Article summary
Did you find this summary helpful?
Thank you for your feedback!
Reconcile Digital Payments
If a digital payment has been successfully processed but failed to post to the account ledger card, take the following steps to reconcile the ledger.
From the Family Data & Accounting tab
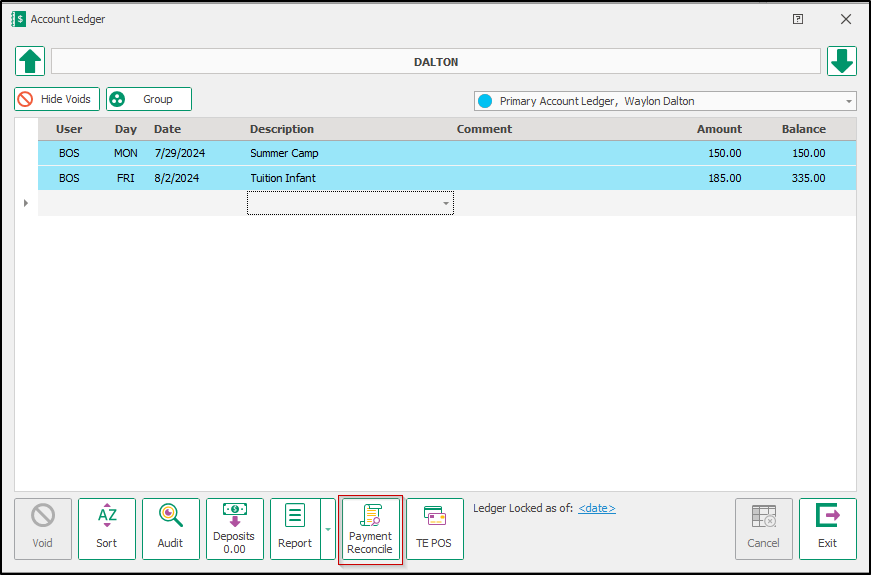
Locate the account you want to reconcile
Click the Ledger icon
Select the Payment Reconcile tool
Input your date range and click OK. The date range limit is 31 days. The range applied for a week is Monday to Sunday.

Select the transactions you want to add to this ledger.
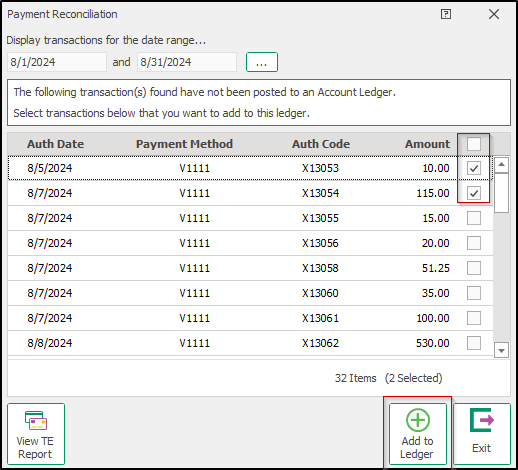


Note
All transactions that have failed to post to a ledger will appear here. Select the correct transaction. You can refer to the payment method and last 4 digits to help identify the transaction. If you have manually reconciled a payment in the ledger, do not use this tool to reconcile the same payment.
- Click Add to Ledger and confirm you want to continue adding transactions to the account ledger.
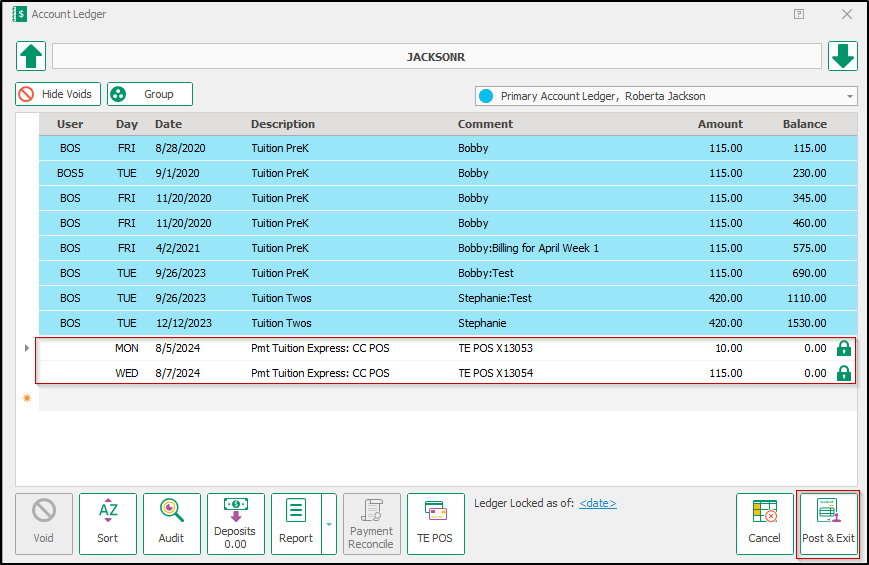
- The reconciled transactions are added to the ledger and color coded white during this phase of reconciliation to help differentiate from previous debit and credit transactions. The transaction will be locked as the payment has already been successfully processed. Click Post & Exit.

Tuition Express Report
To view a TE Report for orphaned transactions, follow the steps above to navigate to the Payment Reconcile tool. The report contains information about the account and cardholder name, along with card type and last four digits for each transaction that has failed to post to a ledger.
- Click Payment Reconcile
- Click View TE Report.
Report Characteristics
The report provides information about the account and cardholder name, card type, and the last 4 digits of each transaction that has failed to post to a ledger. It includes all transactions and can help identify accounts that require payment reconciliation.

Payments Reconciliation Staff Permissions
Access to the Payments Reconciliation feature can be controlled by adjusting user group permissions, ensuring that only authorized staff members are permitted to perform payment reconciliation tasks.
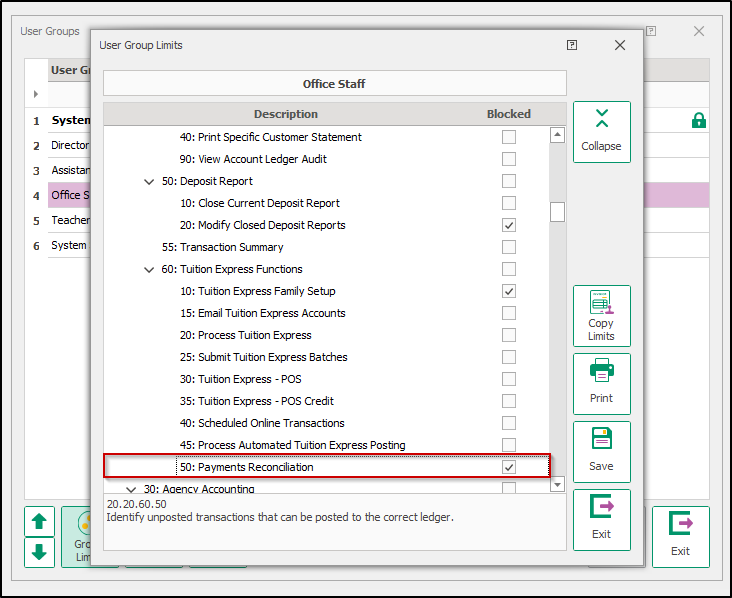
- Go to Configuration > System > Locations & Users > User Groups & Limits.
- Select the desired User Group and click on Group Limits.
- Navigate to Family Data & Accounting > Family Accounting Functions > Tuition Express Functions > Payment Reconciliation (20:20:60:50).
- Check the box next to Payments Reconciliation to block this user group from accessing the feature.
- Save & Exit.

Was this article helpful?