Add & Edit Student Profiles
- 06 Jan 2024
- 1 Minute to read
- Print
Add & Edit Student Profiles
- Updated on 06 Jan 2024
- 1 Minute to read
- Print
Article summary
Did you find this summary helpful?
Thank you for your feedback!
Add new students/children to your account
You can add students one of three ways: on the website, in the app, or (if you have more than 30 students to enter) you can use our spreadsheet template with the student/parent data and it can be bulk imported to the system.
On the Website:
- Go to My School --> Students. Use the "Add Student" button at the top right or use the Quick Actions on the top right of each screen.
- Enter in the child's first and last name and the room that they will be assigned to. Then Select "Create Student."
- The Student will now display in your list of students on both the website and mobile devices. You can then invite the parents.
- Edit the profile to capture any other information including Tags, Notes, and Allergies by simply selecting the student's name in the My School --> Students page.

Note: If you are adding a child who is a sibling to an existing child, click here for details on how to add or link siblings

In the App:
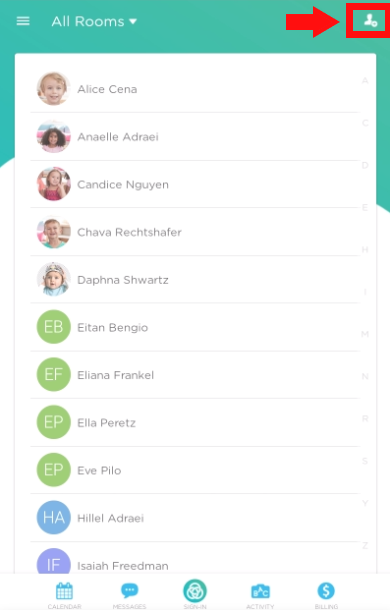
- On the Home screen, use the add child icon in the upper right corner (shown below).
- Enter the name of the child in "Tap to add student." Make sure the room is set correctly, as this will become the child's default room.
- Click on the child's name to edit their profile. Use the "+Add Parent" button or the "+Add Pickup" button to add to the child's authorized pickup list.
- Once added, you can then click on the student's name to edit profile and add tags.
Note: Parents/Guardians will be issued a Sign In-Out pin and have access to the child's account to view daily activities or make online payments; the authorized pickups will only have a Sign In-Out pin with no access to child's account or payments.

Was this article helpful?