Training, Engagement for Procare Desktop
Get Started!
-
Register for our live Procare Engagement webinars: Getting Started with Engagement and Attendance, Daily Activities and Communications. We also have a recorded version, if that is better for you; if you scroll down on the linked page, you can view recordings of both webinars.
- Training Calendar – Engagement for Procare Desktop Be sure to select your time zone first!
-
Schedule your one FREE 45-minute Q&A meeting with your Implementation Manager using their calendar link in your Welcome Email.
- Please keep in mind that you must first attend the training webinars and complete the Launch Guide steps listed below, so please schedule your Q&A so that you have enough time.
- If needed, you can reschedule your Q&A using the “reschedule” link in the confirmation email.
-
Log in to the Engagement website using the login credentials in your Welcome Email.
-
Change your password by clicking the silhouette in the upper right corner of the website and selecting “edit profile.”
-
Make sure that you have mobile devices available to your staff that are compatible with the Procare child care mobile App.
-
Install the Procare child care mobile app on your device(s). For the iOS/Apple devices, download the app from the Apple Store. For Android devices, download the app from the Google Play Store.
-
Log in to the Procare child child care mobile app on your device using the same login credentials as the website.
Understand the Procare Desktop and Engagement Data Sync
Procare Desktop =
Engagement =
The two articles below will help you use Procare Desktop and Engagement together. Please review to gain an understanding of how the data syncs and best practices.
If you update data within Procare Desktop, you will need to wait for the next data sync for the changes to be reflected on the Engagement website and child care mobile app. The system syncs 4 times per day automatically and may take some time to complete. You can also initiate a manual sync once per hour.
Review Your Family Data
-
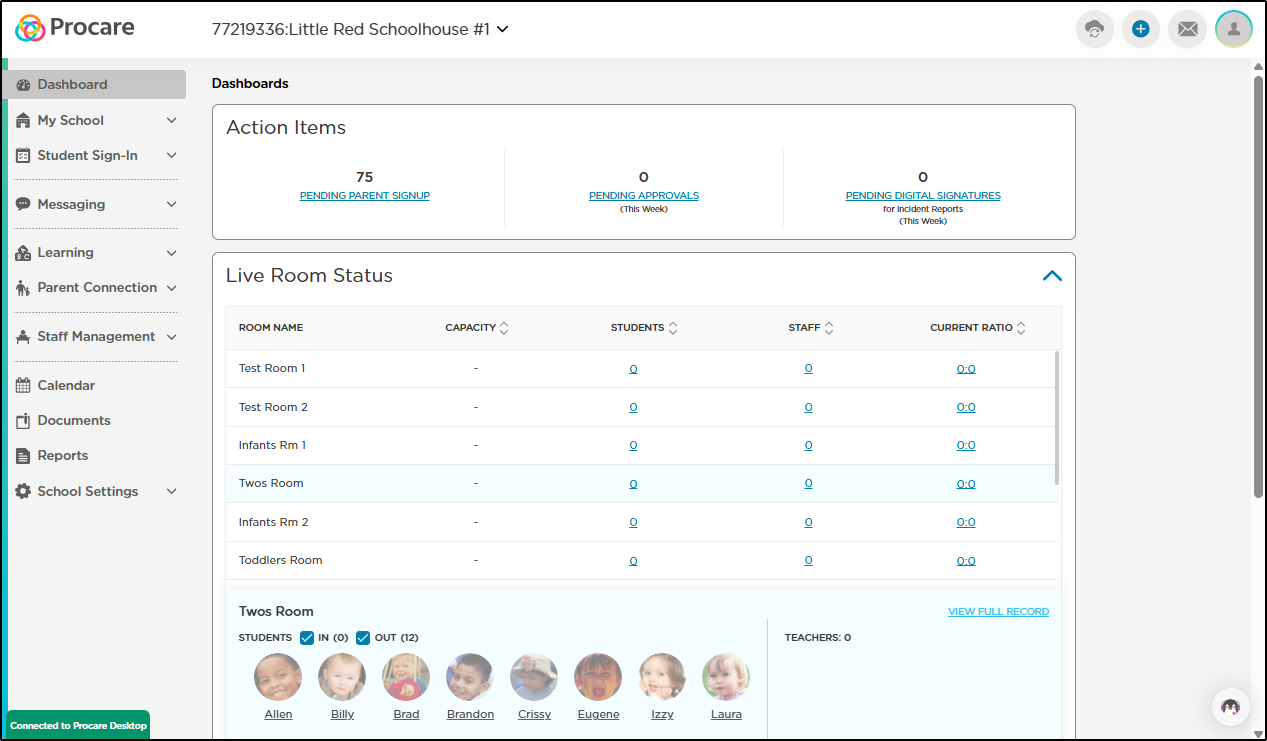
On the Engagement website, take a look at your students listed under My School > Students. Does the number of students listed there (perhaps listed on multiple pages) look accurate?
-
The students will show up on your Engagement app/website roster if their Enrollment Status in Procare Desktop in the Family Data & Accounting tab is set to “Currently Enrolled” with a start date that is not in the future.
-
If there are students showing up in Engagement that are not currently attending, you can update their Enrollment Status in Procare Desktop to deactivate them in the Engagement app and website. You can always reactivate them by updating their Enrollment Status again. You may need to check your hidden list of family accounts, if you are seeing previous students appear in your Engagement student list.
-
Students’ parents will only sync over as parents/guardians if they are listed as payers on the enrolled child’s account.
-
When you click on a child’s name to view their profile on the app’s website, people who are listed under a child’s Additional Authorized Pick-ups are the people check-marked as “pickup” under Information and Relationships on the child’s account in Procare Desktop. If someone is a Parent/Guardian, you should not also see them listed under Additional Authorized Pick-Up section on the app’s website (if you do, this is an indicator that you have a duplicate of that parent in Procare Desktop that needs to be removed).
Review Your Staff Data, Update Their Roles & Permissions, and Invite Them
-
Check the staff list under Staff Management > Staff on the Engagement website. Does this list look accurate?
-
Staff members will only sync to Parent Engagement if they are added as employees under the Employee Data & Payroll tab of Procare Desktop with their email address entered into their employee profile and a Work History of “Currently Employed” that is not in the future.
-
You can only invite staff members to create accounts with Parent Engagement when they have a valid email address on their profile in Procare Desktop.
-
Updating employees’ Work History to anything other than “Currently Employed” (Terminated, Family Leave, Laid Off, etc.) will deactivate them in Parent Engagement. You can always reactivate them by updating their Work History again.
-
You may need to check your hidden list of employees, if you are seeing previous employees appear in your Parent Engagement staff list.
-
If you are seeing duplicates of your staff members in the Parent Engagement Staff list, use the Remove Duplicate People utility in Procare Desktop to merge those profiles.
-
-
Update your staff members’ role (admin or non-admin) and permissions in the Engagement website.
-
Update your staff member’s room assignments. Non-admin staff can only send Classroom Chat messages to parents of students who are assigned to the same room that they are. Admin staff room assignment controls their push notifications for Classroom Chat parent messages. Make sure to assign yourself to all rooms that you want to receive notifications for.
-
Decide if you want Room Visibility enabled or disabled for your non-admin staff.
- With Room Visibility enabled (checked/Full Access), your non-admin staff can view all students and rooms in the center. They can log activities for all students. They can clock into any room. They can be scheduled for any room. If they have access to reports, they can generate reports for any room.
- With Room Visibility disabled (unchecked/No Access), the non-admin staff can only view rooms that they are assigned to, and they can only view and log activities for students who are assigned to the same room that they are assigned to or are signed into the same room that they are assigned to. They can only clock into rooms they are assigned to. They can only be scheduled for rooms they are assigned to. If they have access to reports, they can only generate reports for the rooms they are assigned to.
-
You can invite your staff to create their accounts by navigating to the Engagement website, going to Staff Management > Staff on the left sidebar menu, and by then clicking on “Invite” next to each staff member’s name. They will only have the “invite” option when their email addresses have synced over from their employee accounts in Procare Desktop, so please be sure those are entered there and are accurate.
- Once you click Invite on the staff profile, they will receive an email with instructions on how to create their accounts at your center.
-
A staff member who is also a parent can have access to a school and their child’s profile under one account. Make sure they have the same email listed for both their staff and their parent profile. Invite one account (usually the staff account first), and once they have signed up, go ahead and invite the other account. This will link the two profiles together.
- You may want staff to clock into the Procare child care mobile app using their Kiosk PINs or the staff contactless clock-in method. Please ask your Implementation Manager or Customer Support if you want your staff to be able to clock in and out using their Kiosk PINs on any device; otherwise, they will only be able to clock in and out using their Kiosk PINs on a device logged in on by an admin account. You can view and edit staff timecards and generate reports on the website.
- Please note that staff timecards do not sync between Procare Desktop and the Engagement website.
- If you are using Procare Desktop for payroll, please continue to use the Procare Check-In Station for staff clock-in.
-
If you want to keep track of staff timecards via the Procare child care mobile app and want to be able to refer to the Engagement website for ratio monitoring, then use the Engagement child care mobile app for staff clock-in.
Train Your Staff
-
For administrators, please have them register for the Getting Started with Engagement Webinar.
-
For your non-admin staff, please ask them register for the Attendance, Daily Activities, & Communications Webinar.
-
We also have a recorded version of each webinar, if there are scheduling conflicts; if you scroll down on the linked page, you can view recordings of both webinars.
- Training Calendar – Engagement for Procare Desktop Be sure to select your time zone first!
-
Please also share this collection of Help Center articles and video tutorials with your staff:
Learn How to Log Daily Activities & Message Families
-
Review the Daily Activity options in the app. Practice with a “Test” student (Sarah Test, Mark Test, and Julia Test)!
-
For infant classrooms, you may want to consider enabling the Activity Dashboard so that your staff can quickly view and log each infant’s bottle, diaper, and nap activities within the Procare child care mobile app.
-
Review the various ways of sending and receiving Classroom Chat and Office Chat messages through the app or website. Practice with a “Test” student!
-
Let your Implementation Manager know if you want to set Classroom Chat messages or any daily activities to “Staff Only,” which means that only staff can view the activity until an admin approves it. This way, you or another admin at your center can review the message or activity prior to parents seeing them and receiving a notification. You can always change your mind later! (Important Note: Observation Activities and Name to Face are Staff Only by default and not shared with parents. If you'd like, you can share Observation Activities with families by enabling this under School Settings.)
-
In order to see parent phone numbers appear in Engagement, there are two possible methods you could use, depending on your email settings in Procare Desktop.
-
If your Messaging Options (Configuration > System > Locations & Users > Regions & Schools > double-click on school name and scroll down) are set to Procare, change the “Allow Email Messages” and “Allow Text Messages” section below to “True.” Then, add in an “Email Display Name” and a “Reply To Email.” In each parent’s profile, make sure that their cell phone numbers are listed as “Cell.” They will receive text messages to that phone number. Then, navigate to the Procare Home screen, go to Utilities, and select Download Procare Support File. Click “Yes” on the next window. Enter the password TM01 and click Download. In the next window, click “Update Numbers.” When it has completed, click “Exit.” Each payer’s cell phone number will then sync into Parent Engagement after your next scheduled sync time. There are instructions with screenshots for this process in the Using Procare Desktop with Parent Engagement support article in the Parents and Family Members section.
-
If your Messaging Options (Configuration > System > Locations & Users > Regions & Schools > double-click on school name and scroll down) are set to SMTP or Outlook, please update the parents’ phone settings in Procare Desktop to tell Procare that the parent’s phone can accept text messages. In Procare Desktop, navigate to the Family Data & Accounting tab. Double click on a parent’s name to edit their Person Information page. Make sure the phone number listed is labeled as “cell.” Then, click the Text Message button in the bottom left corner, choose a carrier (It only matters what carrier you select if you are using the text messaging feature in Procare Desktop. Otherwise, you can select any carrier from the list.), confirm the phone number, click “Save” and “Exit,” and then the parent’s phone number will sync into the Parent Engagement App after your next scheduled sync time.
-
-
Let your Implementation Manager know if you want to set messages or any daily activities to “Staff Only,” which means that only staff can view the activity until an admin approves it.. This way, you or another admin at your center can review the message or activity prior to parents seeing them and receiving a notification. You can always change your mind later! Important Note: Observation Activities and Name to Face are always Staff Only and cannot be shared with parents.
Choose How to Log Child Attendance
- Your center is all set up for two-way attendance sync between Procare Desktop and Engagement!
- Please make sure you only log attendance using Engagement or the attendance methods in Procare Desktop listed in this article: Engagement Attendance Sync for Procare Desktop
- We have also set up auto sign-out. Just in case a student is not signed out, the system will automatically sign them out at 6:00pm to prevent any attendance sync issues the next day. We can change that auto sign-out time, if you would like. Please let your Implementation Manager or our Support Team know, if you want the auto sign-out time changed. Just to note, the auto sign-out runs overnight, so any children signed out with auto sign-out will not appear signed out in Procare Desktop until the next day.
- There are several different methods of logging attendance using Engagement. Please review the methods listed in this article and click each type for more information: Sign In-Out Options
- If you use the Parent Kiosk method on a tablet, you may want to look up and send Kiosk PINs for parents and authorized pick-ups.
- In the app, in order to view students in the rooms they are checked in to, rather than the rooms they are assigned to, filter for Only Signed-In Students. For the first month of using the attendance features within Engagement, please check the Engagement website under Student Sign-In > Attendance daily to make sure that attendance logged in the app syncs over to Procare Desktop without a sync error (the red cloud with the x through it).
- When you see a red cloud with an “x” next to a child’s attendance record under Student Sign-In > Attendance, please click on the red cloud error to see what the error is. Then, please refer to the blue “Sync Errors” button (also on the Student Sign-In > Attendance page) to help you troubleshoot and resolve any of these errors. Once the error is resolved, the red cloud sync error icon will remain, but as long as you make sure that the child is checked out of attendance in both systems that day, then their attendance will sync moving forward.
- After resolving any attendance sync errors, please make sure to log the affected students out in both Procare Desktop and Engagement at the end of the day. In Procare Desktop, we recommend using the batch check in/out feature for multiple students or entering the sign-out time directly onto a child’s timecard.
Invite Parents
-
You may want to let your families know ahead of time that you are going to start using Engagement with Procare Desktop and you are going to send an invite email to them with instructions on how to create an account within the Procare child care mobile app or parent portal. We have a Sample Letter you can customize and send to your parents via email.
-
Once you are ready, you can invite parents on the My School > Students page. Click the ellipsis (…) in the upper right of the website to choose “Send Parent Invite.” Select the parents to invite individually, click the “Show students whose parents are not invited,” or click “Select All.”
- Once you send out the invites, they will receive an email with instructions on how to create their accounts at your center.
-
Check to see which parents have signed up and which ones still need to do so.
You can always re-invite parents as many times as you like by clicking on the blue “Re-Invite” text at the top of the My School > Students page in the 4. Engagement website. This only sends an invite email to parents who have not yet signed up. -
After you start inviting parents, here are some resources you can share with them:
Explore the Many Features of the App!
There are many other features to the Engagement functionality for Procare Desktop! If you complete the Launch Guide steps above and are curious about Staff Messaging, creating Lesson Plans, sharing Lesson Plans, Assessments, Newsletters, sharing events on the Calendar, Meal Plans, or our Documents feature, please review the information provided in the link and reach out to your Implementation Manager with any questions. Our Help Center is a great way to learn more about these features as well, and it is available by clicking on your silhouette profile icon in the top right corner of the Engagement website and selecting “Help Center.”