Financial- How to limit rates that display on the admin side when adding programs for children
- 14 Feb 2024
- 1 Minute to read
- Print
Financial- How to limit rates that display on the admin side when adding programs for children
- Updated on 14 Feb 2024
- 1 Minute to read
- Print
Article summary
Did you find this summary helpful?
Thank you for your feedback!
To help streamline the process for admins when entering program/room assignments for children specific rate categories can be assigned to room categories or specific rates.
To setup rate categories:
Step 1: Setup rate category
Step 2: Add rate(s) to the rate category - create new rate or edit current rate
Once rates have been setup go to Setup > Room

Select a room category name

Then select View/Edit Rate Authorizations

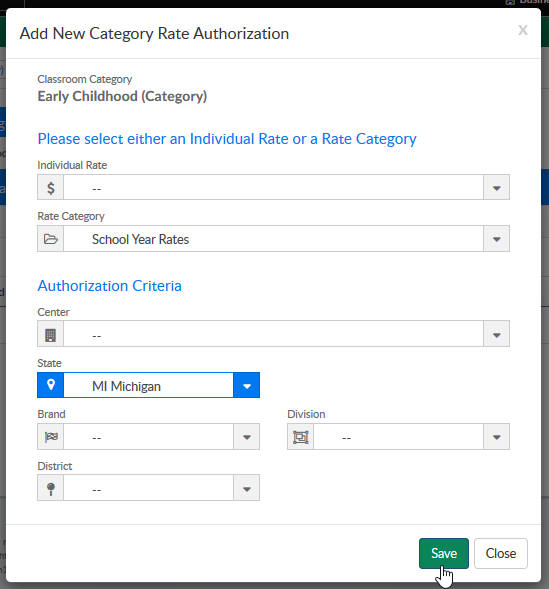
Select the New Authorizations button

Select Authorization criteria, then press Save
- Select either individual rate or rate category
- Select at least one Authorization criteria
- Center
- State - pulls from the Home > General tab
- Brand- pulls from the Home > General Tab
- Division- pulls from the Home > General Tab
- District- - pulls from the Home > General Tab

Example:
On the child tab from the admin side, select the Program/Room Assignment tab-

When a new program/room assignment is going to be added to the child, select the Room, Semester (if applicable), Date Range, Specific Days (optional), Expected Part of Day (optional) and Times the Child is expected (optional).
When the Rate drop down box is selected, only the authorized rates will display-

Was this article helpful?