InSite Check-In - Staff Options
- 14 Feb 2024
- 1 Minute to read
- Print
InSite Check-In - Staff Options
- Updated on 14 Feb 2024
- 1 Minute to read
- Print
Article summary
Did you find this summary helpful?
Thank you for your feedback!
Staff Options
Staff members can check in/out, transfer to a different job category, view announcements, and view their schedule.
Key Point: The InSite Select application will timeout after 1 minute of inactivity.

Staff Check In/Out
- Enter the four - six digit PIN set on the Staff > Staff List > Staff Profile screen
- Select Staff
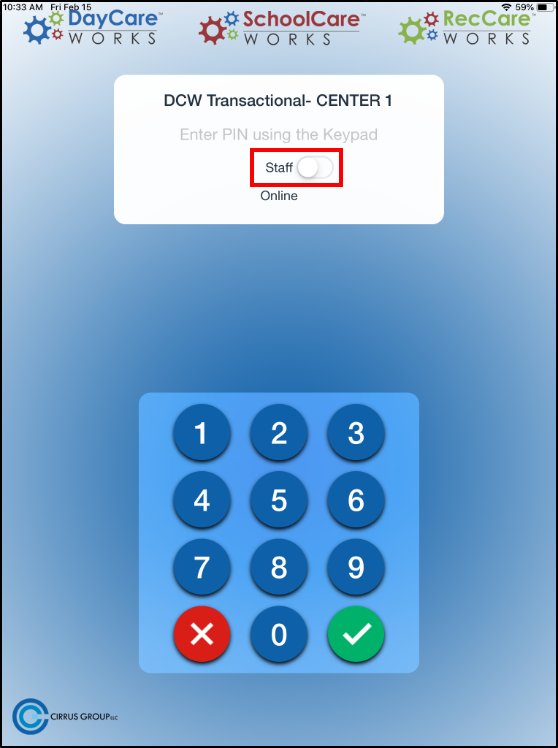
- Click the green check-mark

- The main screen will display staff information, such as:

- First and Last name
- Check in/out status and time. Please Note: if the staff member is checked out, it will state Not Checked In. If the staff member is checked in, it will state Checked In: 11:00 am (the checked in time)
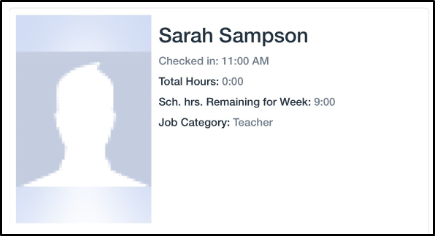
- Total hours
- Scheduled remaining hours for the week
- Job category
- A photo, if applicable
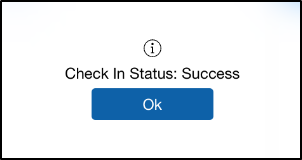
- Click Check In/Check Out
- Click Ok on the status screen
Transfer
Once logged into the Check-In app, staff can transfer into another job category.
- Click Transfer. Please Note: Transfer is not an option if the staff member is not checked in

- Select a Job Category to transfer into, then click Ok

- Click Ok on the confirmation screen. Please Note: the Transfer confirmation screen will say Check Out Status

Announcements
Announcements are added on the admin site under Connect > Announcements.
- Click Announcements

- The active Announcements will display

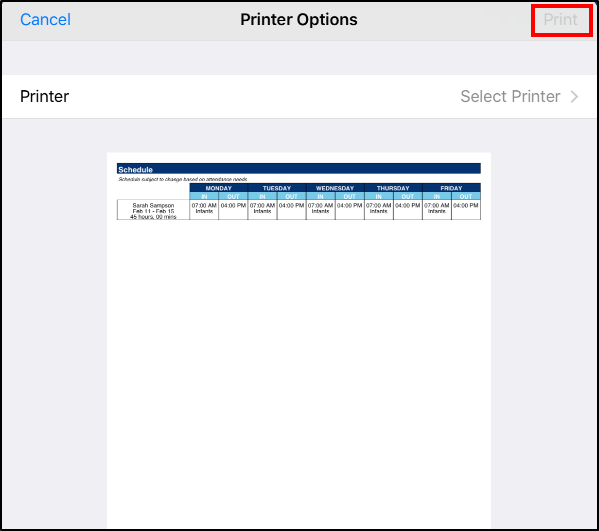
Schedule
Staff members can view, print, or email their work schedule.
- Click Schedule at the bottom of the screen

- The staff’s schedule will display, from there it can be printed or emailed. These options can be turned on/off from the Setup > Mobile Apps > InSite Check-In screen, then click the modify icon for each center.
a. To print schedule:
- Click Print Schedule

- Click Select Printer
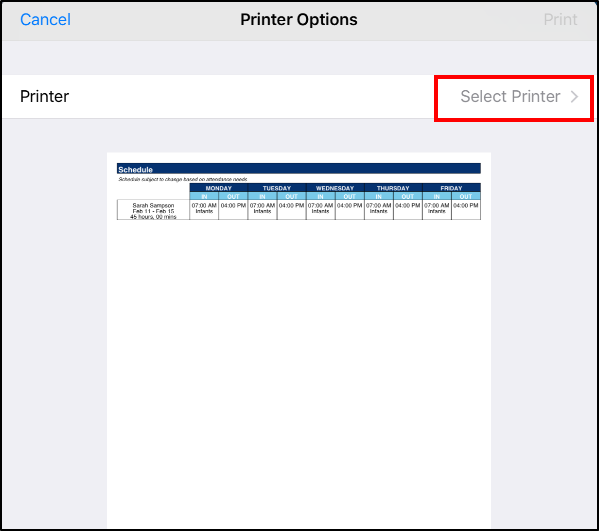
- Click Print
b. To email schedule:
- Click Email Schedule

- A confirmation screen will appear, click Ok. A PDF version on the staff member's schedule will be emailed to the email address on their account.

Was this article helpful?