Using the Health Check Extra
- 31 Jan 2024
- 3 Minutes to read
- Print
Using the Health Check Extra
- Updated on 31 Jan 2024
- 3 Minutes to read
- Print
Article summary
Did you find this summary helpful?
Thank you for your feedback!
How to import children’s health check information (and other data) into the Child Log Sheet.
See Using the Health Check Extra for Employees if you are also tracking those items.
Summary
You’ll export a template in .CSV format from Procare Select containing enrolled students only, add in your health check information, then use the Health Check utility (known as a Procare “Extra”) to bring the information for the day/week back into Procare Select.
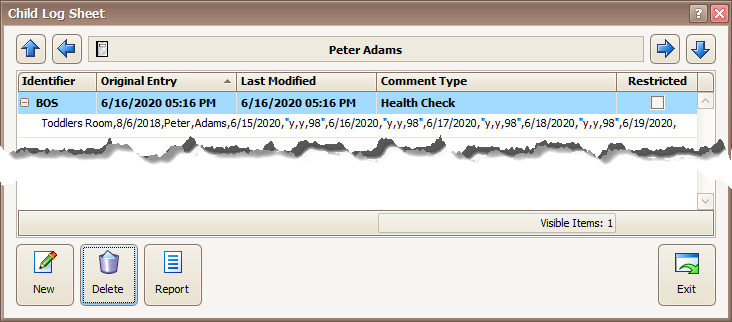
Each time you run the Extra and import the file into Procare, the information will be added to the child’s log notes as one entry for the date of the import. If a child is listed multiple times (on multiple rows) they will have multiple entries added to their log.
Before You Begin
- You must have spreadsheet software (like Excel) or other software that can open and save files in .CSV format.
- You must have Procare Select version 2020.2 or higher installed.
- You may want to create a Child Log Sheet Type specifically for the information you will import, such as a type named “Health Check”.
Download the Health Check “Extra”
- Log on to your computer with local administrator privileges and close all programs, including Procare Select.
- Download
- When the download is complete, double click on the exe file.
- Once the installation is complete, restart Procare.
- The Extra will now be available under Procare Home > Utilities> Extras.
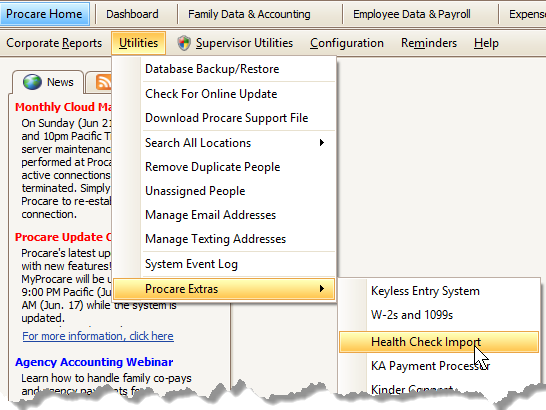
Getting There
From the Procare Home screen go to Utilities > Procare Extras > Health Check Import.
Using Procare’s Health Check Extra
- Go to Reports> Data Viewer> Family Data> Pickup People and Children.
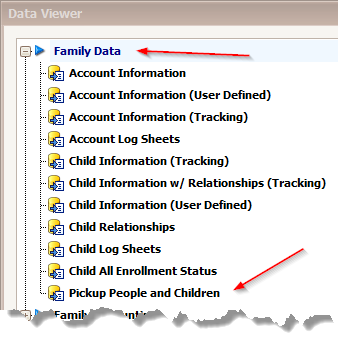
- Click on the Pickup People and Children view.
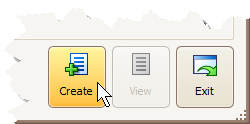
- Click Create.
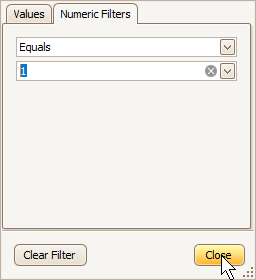
- Click on the top right side of the field named Child Row Count

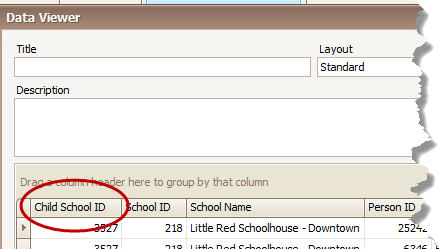
- Set the filter to “1,” and click Close. This give you just the children, and avoids duplicate records (each child will only be listed once, on one row).
- Important! Drag the column labelled Child School ID over to the first column (this identifies the child and MUST must be the first column when you import) so that it looks like this:
- Next to that column, you may want the child’s first name, last name, DOB and classroom for easy identification later.
- Optional: Click the column header of child last name, which will sort the table by last name.
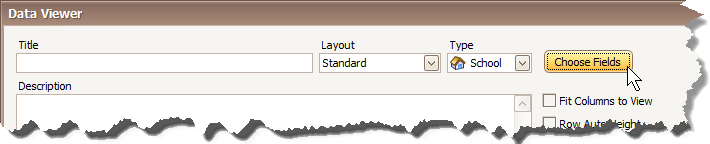
- Optional: Other than the Child School ID, you can now deselect the fields you don’t want by using the Choose Fields button.
- When you have completed selecting the existing fields you want to see in your spreadsheet, you can save your work by entering a Title and clicking Save. That way you’ll be able to reuse the Data View you’ve created without starting from scratch each time.
Note: You will add other columns for health check information when you open the file in your spreadsheet application. - Click Export.
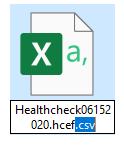
- Select Save as type as .CSV. Then name the file something like Healthcheck6152020 (MMDDYYYY) and save it to your desktop or preferred location.

- Open the file using your spreadsheet software (Excel recommended).
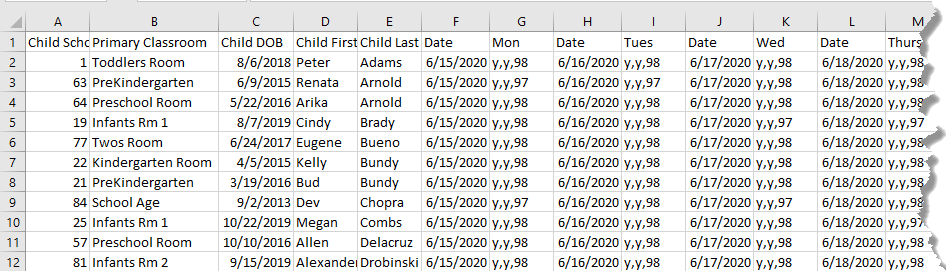
- Add any additional columns where you will enter the daily/weekly information. Below is a sample of answers to two questions (y,y for yes, yes) and a temperature (98, etc.) with columns for each day of the week. The columns and answers you create can be anything you would like.
- At the end of the day or week (depending on how often you import the file back into Procare Select) enter the health check information in the fields you created.
- Save the file. Note: Since you opened the file in .CSV format, saving it should preserve the .CSV format. If you accidentally save it in Excel format, be sure to export it (or Save As) to .CSV format.
- When you are ready to import the data into Procare, right-click on the file you just saved, and rename the extension from .CSV to .HCEF (health check extra format).
- From the Procare Home screen go to Utilities > Procare Extras > Health Check Import.
- Browse to the location where you saved the .HCEF file.
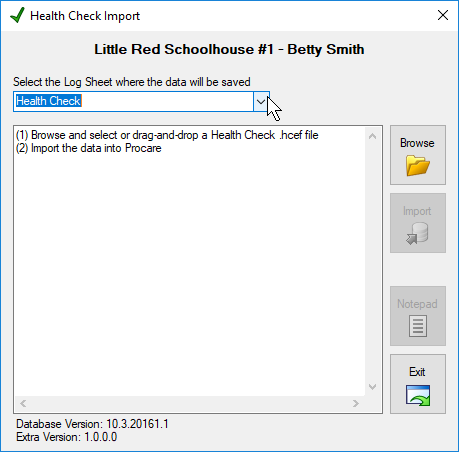
- Select the log file name you want the records to be in, and select import.
- The data will be in each child’s log file.
Was this article helpful?