How to account for customer refunds on the Family Ledger Card and issue a refund check.
Overview
To properly track customer refunds you may wish to use both the Family Data & Accounting module (to track the family’s balance) and the Expenses & Ledger module (to issue the refund check). If you’re using other accounting software to issue the check, or just writing it by hand, the concept is the same. The refund check itself would be counted as negative revenue (a decrease in revenue).
Before You Begin
In System Configuration go to Charge/Credit Descriptions:
a. Make sure you have a description under the Other Charge tab called something like “Customer Refund”. Assign it to a GL Account like 4040.00 Customer Refund (a revenue account).
b. Under the Credit tab you may also want a description like “Partial Tuition Refund”. This could be assigned to the GL Account you normally use for tuition revenue like 4000.00 Tuition. Or, you could just use “Miscellaneous Credit” if you prefer.
Note: General Ledger numbers used are for example only. Your numbers may vary. General Ledger Numbers are set up in the Chart of Accounts.
Refund on Family Ledger
When you issue a refund, the Family Ledger Card may:
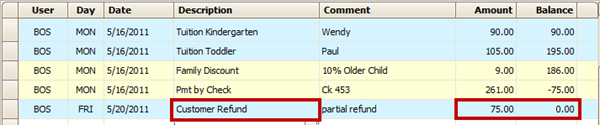
a. Show a credit balance, in other words they have over paid. To bring the balance to zero post a charge for the appropriate amount (we’ll say $75 for our example) using the “Customer Refund” charge description.
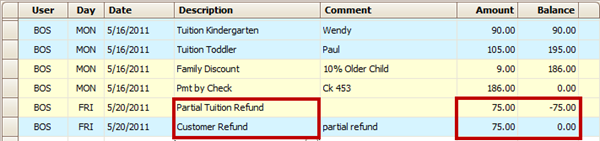
b. Or the customer may already have a zero balance, for example they paid in full but left the center before their contract was up and you wanted to refund a portion of their payment. In this case you would first post a credit (like “Partial Tuition Refund” or “Miscellaneous Credit”) to give the family a credit balance. Then post a “Customer Refund” charge, for the same amount, to bring the balance back to zero. Their balance ends up being the same, but by making these entries it’s clear you gave them a refund.
Issue a Refund Check
- To issue the refund check, go to the Expenses & Ledger module and Create a Vendor called “Refund”. You’ll use this vendor for any future refund checks you may issue to different people.
- Go to the Check Calculation screen.
- Click the Pay To button and type over the word “Refund” with the customer’s name.
- Enter the amount of the check as a negative number (image below). The negative entry will reduce your customer refund revenue, offsetting the 75 charged to the customer’s ledger card.
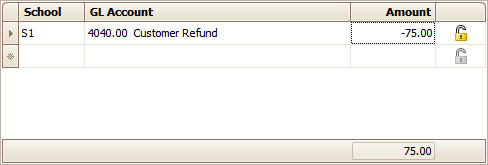
Hint: You may want to enter the GL Account number under the Standard Accounts button along with a standard amount of -1.00. The minus sign will help remind you to enter it as a negative amount.