Set Up Immunizations, Shot Records and Requirements
- 08 Feb 2024
- 2 Minutes to read
- Print
Set Up Immunizations, Shot Records and Requirements
- Updated on 08 Feb 2024
- 2 Minutes to read
- Print
Article Summary
Share feedback
Thanks for sharing your feedback!
Set up your immunization schedule and any other date based requirements needed for your state, county, etc.
Global Immunizations, Global or Local Requirements
Immunizations are always “global”. In other words they may be set for all locations at once. Other date based requirements, such as an annual physical, may be either “global” or “local”. If you have just a single location, the only difference is the order in which they appear. Global items appears before local ones on the child (or employee) Immunization & Requirements screen. If you have multiple locations you may “expose” global items to particular locations only, while local items are unique to their individual school.
Getting There
- From the Procare Home screen go to Configuration > System > Data Management > Immunizations & Requirements.
- Dbl-click either Global Child Immunizations & Requirements or Local Child Requirements.


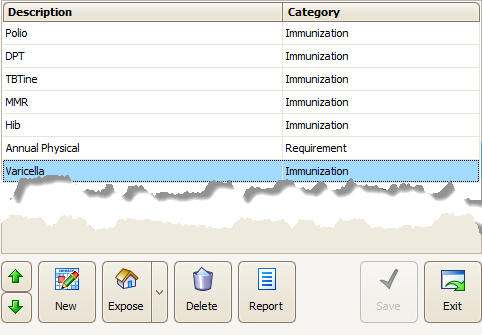
Edit an Existing Immunization or Requirement
Just dbl-click the name of the item, like Varicella, make any necessary changes and click Save > Exit.
Add an Immunization or Other Requirement
Click New.

Enter a Name, Category and Tool Tip (optional). For “local” items the Category will be set to Requirement.

Enter the Schedule for this item, that is, the period when each vaccination or other requirement is due.
- Click the first (blank) line and choose whether this first occurrence is due at so many “months of age” or so many “days after enrollment”. For example it may initially be due at birth (0 months), 1 month, 6 months, etc. Or, perhaps it is paperwork due 30 days after enrollment. Enter the appropriate number and click the small Save button.


2. If this item is due a second time, click the second (blank) line and choose whether it is due so many “months later”, “every (so many) months”, or at so many “months of age”. Enter the appropriate number and click the small Save button.

3. f this item is due three or more times, click the next (blank) line and choose the appropriate answer. The choices depend on how you set up the second occurrence. If you said at so many “months of age”, then any additional items must also be due at a specific age.

4. If on the second item you said so many months later, for the third item you could choose so many “months later” or “every so many months”. This may be appropriate for a recurring physical.

5. Repeat this step until all required occurrences have been scheduled.You’ll end up with a complete schedule showing when each shot in the sequence is due. Click Save > Exit

You will now be on be on the Regions and Schools Exposure screen. Check all locations that need access to this group. You will not be able to see this item for any children/employees until you Expose it. See: Exposure Settings. Click Save, Exit.

Use the Up & Down arrows to change the order as needed, then click Save > Exit.
Your set up is complete, You may now enter Immunizations Dates and Exemptions for a child.


Was this article helpful?