Manage Region and School names and Set Overall Options on a Region wide or individual School basis. If you have just one location you’ll have a single Region (your city) with one School (name of your center).
Getting There
You must be logged as a System Supervisor for this task.
- From the Procare Home screen go to Configuration > System > Locations & Users.
- Dbl-click Regions & Schools.

Change the name of a Region, or Add a New One
In most cases you’ll have just one region, but you’ll want to change its name and contact information.
Hint: A Region is a geographic area like ‘Pacific Northwest’ or ‘SE Florida’. If you have just one center use the name of your city. A School is the name of your center. If you have more than one location just indicate that in the name like: Kid’s Place – Downtown.
Change an existing region
-
Click once on the Region Name (like “My Region”) to select it, then click Edit (bottom of screen).

-
Make any desired changes.
-
Click Save > Exit.
Add a new region (for large organizations only)
If you manage locations spread across several geographic areas or that have separate tax ID numbers they should be placed in separate regions. Locations that share a common Bank Account should be in the same region. Each region requires at least one school within the region.
- Click Add Region.
- Enter a Region Name (like your area or city) and a short abbreviation for the Region Code (like PNW for Pacific Northwest).
- Enter the name of the director, email, address, etc. (optional).
- Click Save > Exit.
Change the name of a School or Add a New One
Give the appropriate name to each of your child care locations (known as schools) and update the contact information.
Change an existing school
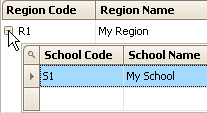
- Click the plus sign (+) next to the Region Code to see any existing schools in that region.
Single Location
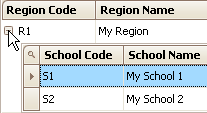
Multiple Locations
-
Click once on the School Name to select it, then click Edit (bottom of screen). For example, you’ll want to change the default name of “My School” to be the actual name of your facility, like “Little Red Schoolhouse”.

-
Make any desired changes.
-
Click Save > Exit.
Add a new school
If you only have one location, there’s no need to add a new school; just change the name of “My School” (explained above).
- Click the plus sign (+) next to the Region Code to see any existing schools in that region.
- Click Add School.
- Enter a School Name (the name of your center) and a short abbreviation for the School Code (like S2 to indicate your second location).
- Enter the name of the director, email, address, etc. (optional).
- Click Save > Exit.
You’ll want to Set the Options for your regions and schools including Email Options.